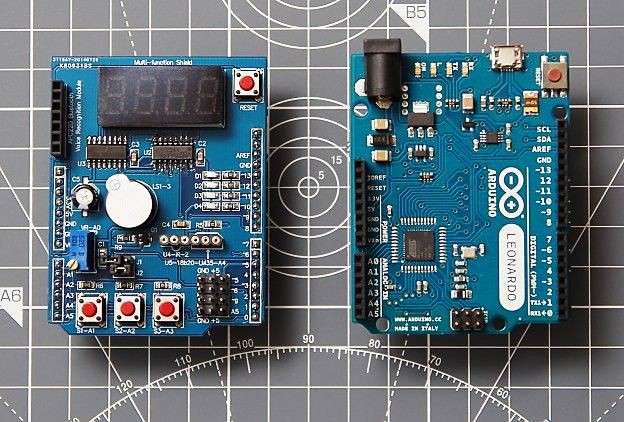
The Arduino range of microcontroller boards is a fun way for beginners to learn coding that connects with the outside world. In addition, there are numerous add-ons (shields) with components already built on to them, ready to be utilized with a bit of code.
Compare this to way back in 1983, when my folks bought me a C64 computer (I was about 10 years old at the time). I was soon learning how to connect some basic components and sensors to its joystick and parallel ports to try and do some interesting things. On one occasion, I actually managed to fry this £350 computer while soldering a wire that was connected to a port when it was switched on at the mains. Fortunately, the C64 was repaired at minimal cost, but don’t try something like that yourself. Today, if you do fry an Arduino, it’s not as big a deal as frying a home computer.
This Hackatronics coding series starts off with an Arduino multi-function shield (available from Hobby Components and other internet suppliers). The shield is for R3 type boards, and all our code examples have been tested to work on an Uno, Leonardo and Mega 2560. We have developed a library to make it easy to access its on-board components, as well as a number of readily available sensors, such as temperature, sonar, heart beat, and motion sensors.
More advanced coding projects involve the use of an Android device interacting with Arduino boards to do more interesting and challenging things. The code is reasonably straight forward, and could be modified to suit the coder’s own requirements.
Familiarity with the Arduino platform is assumed, as is the installation of the Arduino development environment. To view a summary of the applications using the multi-function shield, see the short video here.
The object of the series is not to teach coding, but to provide working examples and applications that can be experimented with and enhanced – well, that’s how many of us learnt to code all those years ago. Have a look at our other projects, some of which are for the more experienced enthusiast. Have fun coding!
- Arduino Multi-function Shield Projects
- Arduino Multi-function Shield Bonus Sketches
- Arduino Web Server – Responsive Web Apps Using 5100 Ethernet Shield
- Arduino IoT Remote Data Collection and Visualization
- Arduino LCD Shield – Coding Menus the Easy Way
- Android and Arduino Coding Fun
Don’t forget to like, share or comment!


Dear sir,
I have built the sonar ranger like yours, it works fine..
Here comes the queston: Is it possible to make the sonar ranger using arduino mini, without switch or display?
I want to make this sa small as possible, for a friend who is blind.
Greetings,
Jean
Hello, maybe nobody will read this but I have an issue with the 7-segment display, all four digits have the “b” segment on all the time, which makes almost impossible to read easily and correctly most of the values. Any ideas, please? Could be an issue of the board or the software? Thank you!
Check if the pins under the shield are not contacting the arduino usb connector. If so, try putting insulating tape over the connector.
Thank you so much for your help, that was the problem indeed, it works perfectly now!
when I program arduino board, pins on multifunction board has revers function! when the pin is high, leds om MFS turns off and vis versa! so projects for seven segments don’t work!!
why this is happened?
Hi, there is some information about this in the comments section of Multi function shield.
Hello.
I am using Multifunction shield. I am using a 7-segment displayer. I have one problem and is that the four upper-right segments of the displayer are always on. How could I solve this?
Thanks in advance,
greetings from Spain.